

openssl 소스코드를 static library로 빌드하여 MFC 프로젝트에 통합하는 내용입니다. 그럼 따라와요 출발~
(참고로 실패한 글입니다.)
프로젝트에 어떤 crypto library를 적용할지 각 라이브러리 비교 후 crypto++과 많은 고민 하다가 openssl로 결정.
각 라이브러리 비교페이지는 아래 위키를 참조해주세요.
https://en.wikipedia.org/wiki/Comparison_of_cryptography_libraries
Comparison of cryptography libraries - Wikipedia
From Wikipedia, the free encyclopedia Jump to navigation Jump to search The tables below compare cryptography libraries that deal with cryptography algorithms and have API function calls to each of the supported features. Cryptography libraries[edit] Name
en.wikipedia.org
1. openssl 소스코드 다운로드
For Production Use: https://www.openssl.org/source/ 에서 .tar.gz 을 받습니다.
최신소스: git://git.openssl.org 에서 다운로드합니다. git소스 빌드 해봤는데, 빌드에러가 나서 tar.gz으로 받았습니다.
2. 빌드환경
윈도우 플랫폼 적용 가이드를 보고 따라 합니다. 얼마 전 프로젝트에 추가했던 simdjson이나 ta-lib 같은 라이브러리와 다르게 perl이랑 어셈블러도 설치해야 하고 이것저것 유의사항도 많고 현기증이 나려고 하지만 그렇다고 crypto 알고리즘을 직접 개발해서 사용할 능력은 전혀 안되고 시간은 금이므로 눈물을 머금고 침착하게 한 단계 한 단계 진행해 봅니다.
https://github.com/openssl/openssl/blob/master/NOTES-WINDOWS.md
GitHub - openssl/openssl: TLS/SSL and crypto library
TLS/SSL and crypto library. Contribute to openssl/openssl development by creating an account on GitHub.
github.com
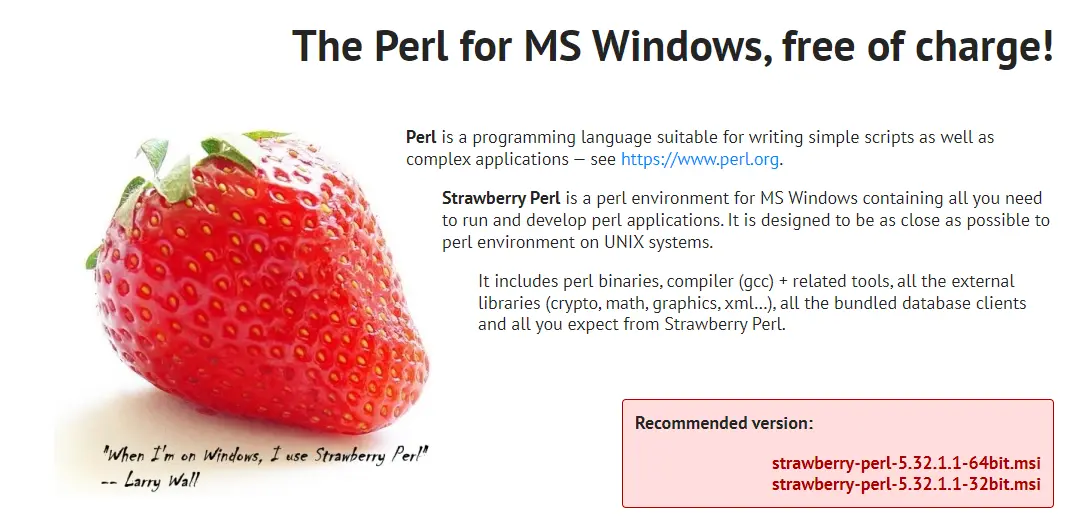
2.1. Perl 설치
We recommend Strawberry Perl, available from http://strawberryperl.com/
Please read NOTES.PERL for more information, including the use of CPAN. An alternative is ActiveState Perl,
https://www.activestate.com/ActivePerl for which you may need to explicitly build the Perl module Win32/Console.pm via https://platform.activestate.com/ActiveState and then download it.
라고 합니다.
딸기펄을 권장한다고 해서 딸기펄 홈페이지에 가보니 정말 먹음직스러운 딸기사진이 있네요. 10년전만 해도 파이썬보다는 펄이 유명했고 저 역시 회사에서 서버 관리 스크립트는 전부 펄을 사용했는데 정말 오랜만에 반가운 펄입니다. 금요일밤에 펄 스크립트 코딩하다가 날밤 새고 토요일 이른 아침이 되었는데 집에 가려고 보니 복도가 온통 물왁스칠이 되어 있고 여사님들이 안 마른 왁스 밟으면 안 된다고 도대체 어디서 튀어 나온 녀석인가 했던 기억이 납니다.
"strawberry-perl" 64bit 버전을 받아서 설치 했습니다.
2.2. Microsoft Visual C Compiler 설치
Visual Studio를 설치했으면 같이 설치되어 있습니다.
2.3. Netwide Assembler (NASM) 설치
NASM is the only supported assembler. It is available from https://www.nasm.us
라고 합니다. Perl은 딸기를 권장했지만 어셈블러는 NASM만 지원한다고 되어 있네요. 어셈블러도 참 오랜만에 받아 봅니다. 대학입학 전에 프로그램 crack버전이 너무 신기하여 알아보니 리버싱이라는 걸 해야 하고 그걸 하려면 어셈블리어를 알아야 한다고 하여 IBM 어셈블리어 책을 사서 공부하고 하필 그때 또 게임도사?라는 분이 크랙블로그를 운영하고 있어서 올리디버거랑 뭐랑 뭐랑 잡다한 툴 나름 따라 해보다가 배경지식이 없으니 때려치웠다가 다시 학부 2학년때 어셈블리어 강의 듣고 재밌어서 임베디드로 방향 잡고 대학원 프로젝트로 에뮬레이터 만들 때도 어셈블리어 공부 해뒀던 덕을 많이 봤었네요.
nasm-2.15.05-installer-x64.exe를 받아서 설치했습니다.
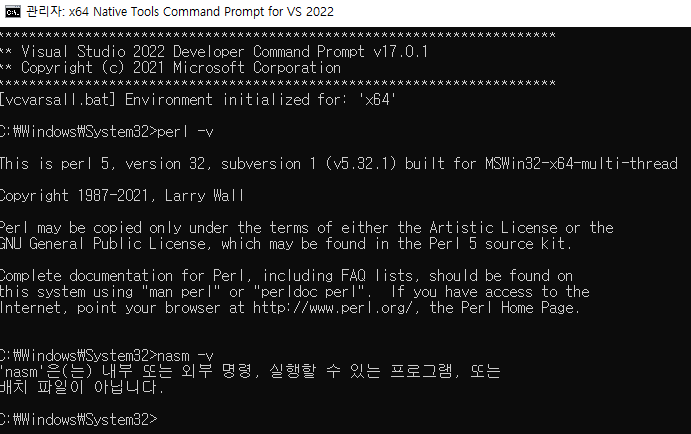
2.4. PATH 환경변수 등록
Make sure both Perl and NASM are on your %PATH%
라고 합니다.
"perl -v"와 "nasm -v"를 쳐보니 nasm이 PATH 등록이 안되어 있네요.
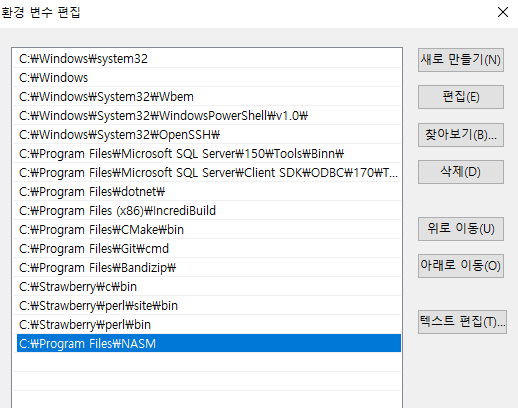
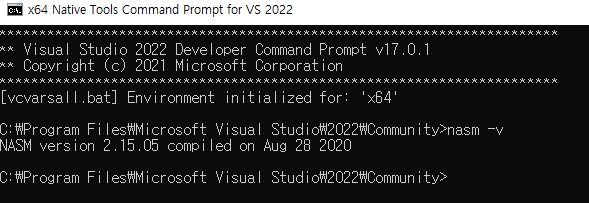
시스템 속성 창의 "환경 변수"에 가서 NASM 설치경로를 시스템 PATH에 추가해 줍니다. 그리고 prompt를 다시 열어서 "nasm -v" 입력하면 제대로 실행된 것을 확인할 수 있습니다.

3. Native builds using Visual C++
아래는 윈도우 환경 빌드방법에 대한 가이드입니다.
even if you are impatient!! 성질 급하신 분들도(저 포함) 꼭꼭 주의 깊게 읽어달라는 문구가 있네요.
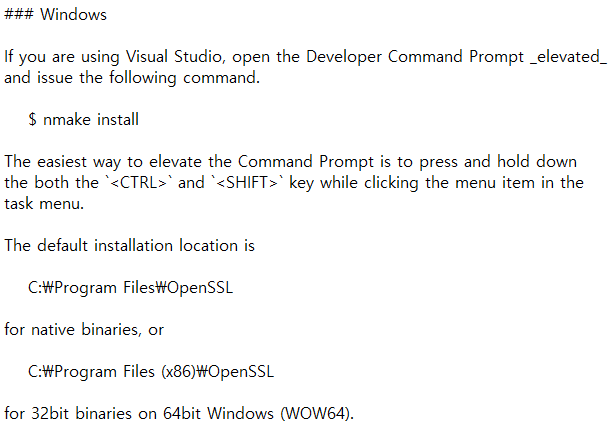
요약: 위 과정까지는 유저권한, 아래 "nmake install"은 prompt를 꼭꼭 관리자권한으로 상승시켜서 진행해 달라고 하네요.
어차피 하다가 권한오류 나서 실패하면 엥? 모지 하면서 다시 관리자권한으로 재시도할 테니 큰 의미는 없어 보입니다.
Installing OpenSSL ------------------ The following commands will install OpenSSL to a default system location. **Danger Zone:** even if you are impatient, please read the following two paragraphs carefully before you install OpenSSL. For security reasons the default system location is by default not writable for unprivileged users. So for the final installation step administrative privileges are required. The default system location and the procedure to obtain administrative privileges depends on the operating system. It is recommended to compile and test OpenSSL with normal user privileges and use administrative privileges only for the final installation step. On some platforms OpenSSL is preinstalled as part of the Operating System. In this case it is highly recommended not to overwrite the system versions, because other applications or libraries might depend on it. To avoid breaking other applications, install your copy of OpenSSL to a [different location](#installing-to-a-different-location) which is not in the global search path for system libraries. Finally, if you plan on using the FIPS module, you need to read the [Post-installation Notes](#post-installation-notes) further down.
아래는 윈도 환경에서의 Make 가이드입니다.
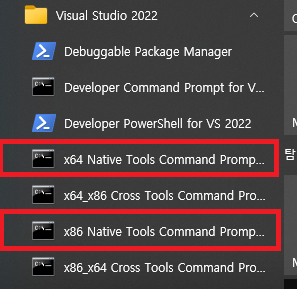
3.1. Native Tools Command Prompt for Visual Studio를 실행
Visual Studio 설치 경로에 보시면 Command Prompt가 있습니다. x86과 x64가 있습니다.
3.2. 패키지 설정
1. 에서 다운로드한 OpenSSL 소스패키지 압축을 풀어둔 경로로 이동합니다.
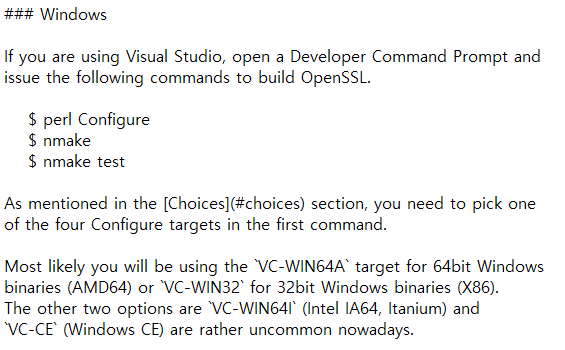
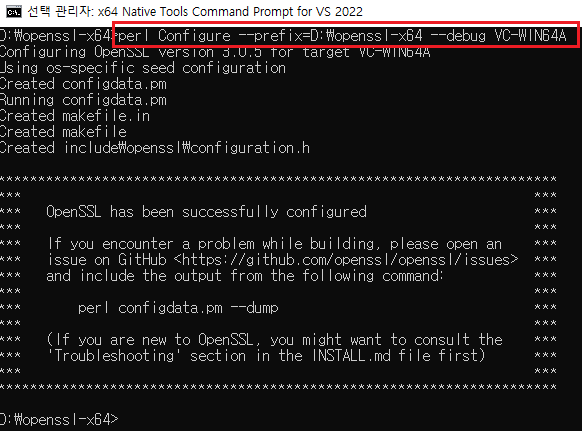
"perl Configure"를 실행할 건데 저는 64bit와 32bit용이 각각 필요하여 target option으로 "VC-WIN64 A"와 "VC-WIN32"를 입력할 겁니다. 그리고 "--prefix" 옵션으로 현재 openssl 소스패키지 경로를 입력하여 생성 라이브러리도 같은 경로에 생성되도록 하겠습니다. 다른 옵션에 대한 정보는 소스패키지 경로의 INSTALL.md 파일에 나와있는 것 같습니다.
Default Build Type은 "Debug"라고 합니다. Release는 "--release" 추가해야 합니다.
그리고 "/MTd", "/MT" 옵션 추가해줘야 하고 이 옵션으로 생성된 makefile 열어서 보면 flag에 "/MD" 라고 되어 있는 것 삭제해주면 됩니다.
패키지 경로는 최대한 짧게 해 주시고(구글에 관련 에러 사례 많음) 처음부터 관리자권한으로 실행해 주세요.
3.2.1. 유의사항
- Native Tools Command Prompt를 처음부터 관리자권한으로 실행하세요. 유저모드에서 컴파일 에러 발생하네요.
- 소스코드 경로를 너무 길게 하지 마세요.
- --prefix 경로 지정 시 소스코드 경로와 다른 곳을 지정해야 합니다. 안 그러면 install시 에러 발생함.
3.3. OpenSSL 라이브러리 빌드
"nmake" 명령으로 OpenSSL 라이브러리를 빌드합니다. 컴파일 타임이 상당히 오래 걸리네요. 4가지 버전 만들어야 하는데 한번 할 때마다 30분 걸리네요.
nmake
중간중간 fatal error u1077이랑 app.pdb파일을 열 수 없다 등이 발생하며 멈췄는데 이게 구문 오류가 아닌 윈도 환경과 병행성문제 등 Race Condition으로 밖에는 달리 설명이 안 되는 환경을 타는 것 같아, 오류발생시마다 그냥 계속 nmake 재 실행해서 결국 빌드 완성시켰습니다.

static library .lib은 --prefix 지정경로의 lib에, dynamic library .dll은 bin에 생성되고 지정경로의 include에 헤더파일이 생성됩니다.

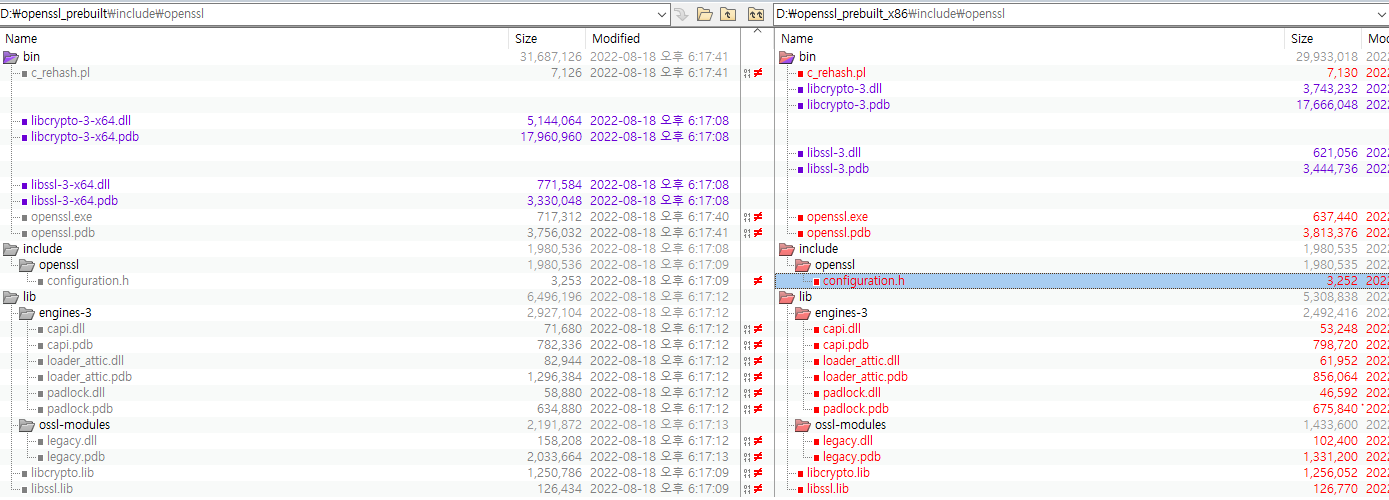
3.3.1. x64 vs x86 결과물 비교
다른점은 .lib, .pdb, .dll 이 다르네요. 그리고 헤더파일 중 configuration.h 파일 1개만 아키텍처가 달리 적혀있습니다.
하나의 프로젝트에 통합하여 버전별 맞는 파일이 연결되도록 할 것입니다.
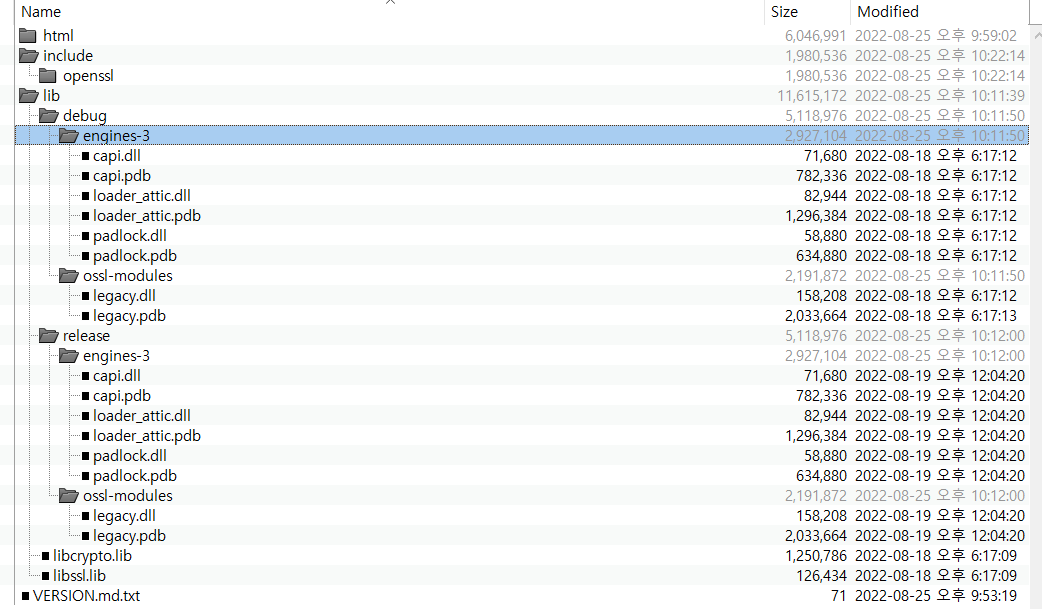
4. 프로젝트에 라이브러리 링크
프로젝트의 "Prebuilt"경로 하위에 아래 구조로 복사하였습니다. Static linking이라 bin폴더의 .dll은 제외.
4.1. 프로젝트 속성 설정
(Debug/Release 공통)
4.1.1. C/C++-General-Additional Include Directories에 "$(ProjectDir)\Prebuilt\OpenSSL\include\" 추가.
4.1.2. Linker-Additional Library Directories에 "$(ProjectDir)\Prebuilt\openssl\lib\" 추가.
4.1.3. Linker-Input-Additional Dependencies에 "libcrypto.lib;libssl.lib" 추가.
(Debug)
4.1.4. Linker-Additional Library Directories에 "$(ProjectDir)\Prebuilt\openssl\lib\debug\" 추가.
(Release)
4.1.5. inker-Additional Library Directories에 "$(ProjectDir)\Prebuilt\openssl\lib\release\" 추가.
아래 에러는 applink.c 파일명을 applink.cpp로 바꾸고 최상단에 "#include "pch.h"" 추가해 주면 됩니다.
applink.c(9,10): fatal error C1853: 'x64\Debug\Noyecube.pch' precompiled header file is from a different version of the compiler, or the precompiled header is C++ and you are using it from C (or vice versa)
applink.cpp(145,1): fatal error C1010: unexpected end of file while looking for precompiled header. Did you forget to add '#include "pch.h"' to your source?
아래 에러는 프로젝트속성에서 SDL 체크 해제하면 됩니다. 이미 빌드된 라이브러리 안에서 fopen 등을 가져다 썼기 때문에 치환할 수 없음.
applink.cpp(123,47): error C4996: 'fopen': This function or variable may be unsafe. Consider using fopen_s instead. To disable deprecation, use _CRT_SECURE_NO_WARNINGS. See online help for details.
applink.cpp(131,46): error C4996: '_open': This function or variable may be unsafe. Consider using _sopen_s instead. To disable deprecation, use _CRT_SECURE_NO_WARNINGS. See online help for details.
이렇게. dll 사용이 아닌 정적. lib 생성 후 프로젝트에 포함시키려고 발버둥 쳐봤으나 결국은 .dll 의존성 에러가 뜨네요.
그냥 안 쓸랍니다. 리눅스환경에서는 몰라도 윈도우에서 .dll 말고 정적라이브러리 테스트는 제대로 안 해주는 것 같네요. 안 올리려다가 허비한 시간이 아까워서 글은 올립니다.
'프로그래밍 > C | C++' 카테고리의 다른 글
| Network bridge 방식으로 증권사 API 활용하기-1 (1) | 2023.06.21 |
|---|---|
| [MFC] Modeless Dialog 생성하기 (0) | 2022.09.12 |
| [MFC] C++ MiniDumpWriteDump (0) | 2022.08.12 |
| [MFC] 로그(Log) 출력 Logger (0) | 2022.08.12 |
| [MFC] simdjson library 설치 (0) | 2022.08.01 |